
The first time I tasted tiramisu bars, I was at a small cafe tucked away in a charming little neighborhood. The moment I took a bite, the perfect balance of coffee-soaked layers, creamy mascarpone filling, and a dusting of cocoa made it unforgettable. It surprised me how this layered tiramisu dessert could capture all the traditional flavors of classic tiramisu but in a simple, handheld bar form. That experience inspired me to create my own version because I knew this coffee flavored dessert bar would be a perfect fit for busy families craving comfort without fuss.
Tiramisu bars perfectly embody my approach to cooking on the Carmen Wausa Blog — approachable, comforting meals that bring people together. I love sharing recipes where everyone can join in, and this one offers a no-bake tiramisu bars option that’s surprisingly simple with incredible flavor. Whether you call it mascarpone tiramisu squares, cream cheese tiramisu bars, or layered tiramisu dessert in a bar shape — these treats bring warmth and joy to any gathering. I’m genuinely excited to share this recipe because it blends rich flavors with easy steps, making dessert time something to look forward to.
If you love tiramisu but want a fuss-free version that feels homemade and satisfying every time, this recipe is for you. Plus, it’s perfect for anyone who wants a classic coffee flavored dessert bars experience without turning on the oven. Let’s dive into my tried-and-true ingredients for tiramisu bars, followed by step-by-step instructions that will have you serving up mascarpone tiramisu squares in no time!
Ingredients:
Here’s what you’ll need to make these tiramisu bars a hit:
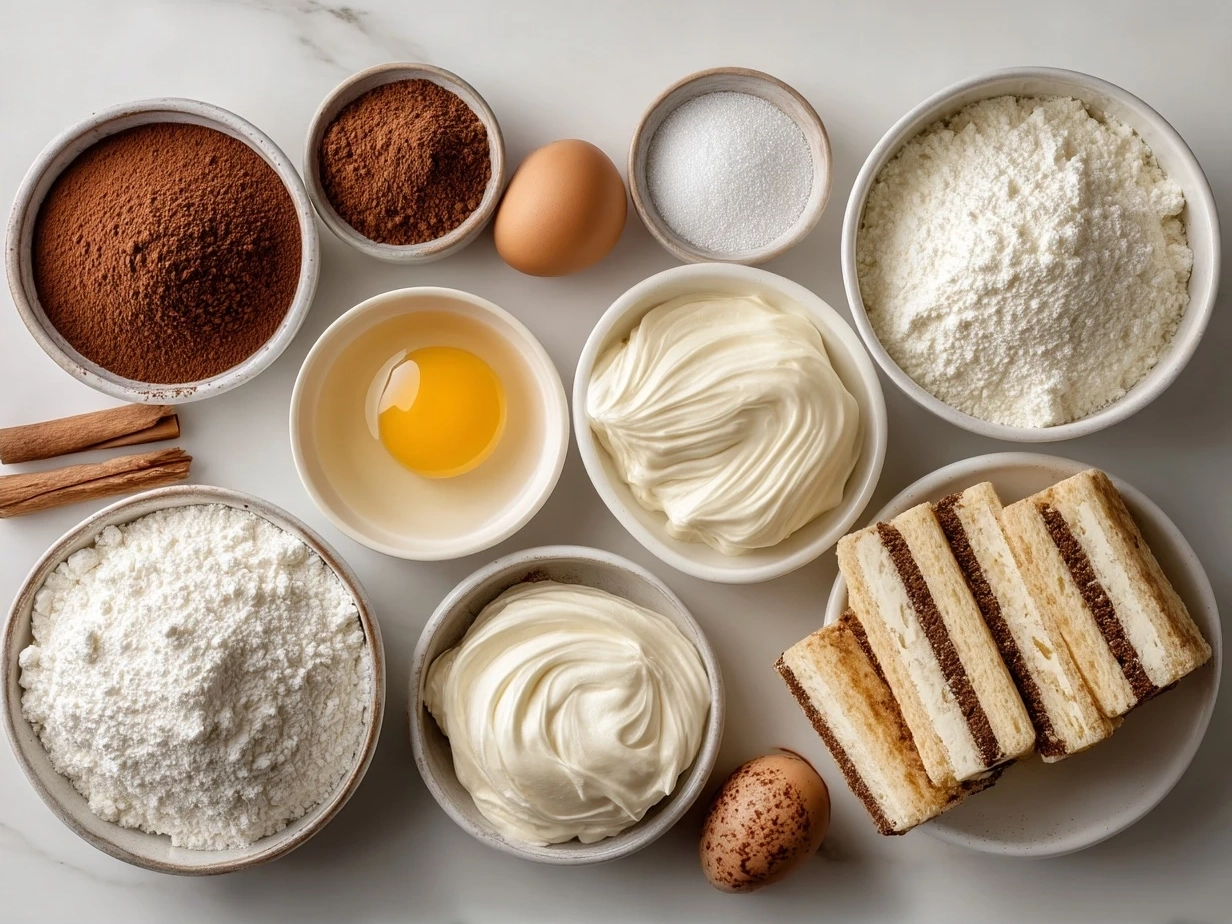
- 1 ½ cups ladyfinger cookies (or savoiardi), crushed slightly for layering
- 1 cup strong brewed coffee, cooled
- 1 tablespoon coffee liqueur (optional but adds depth)
- 8 ounces cream cheese, softened (this is key for creamy tiramisu bars)
- 1 cup mascarpone cheese, room temperature (for authentic mascarpone tiramisu squares)
- ¾ cup powdered sugar
- 1 cup heavy cream, chilled
- 1 teaspoon pure vanilla extract
- Unsweetened cocoa powder, for dusting
- Chocolate shavings or curls (optional, for garnish)
The secret to amazing tiramisu bars is using both cream cheese and mascarpone instead of just one. This blend gives that smooth, slightly tangy richness you crave in tiramisu without any complicated steps. For the coffee soak, freshly brewed, cooled coffee captures that deep flavor, and adding a splash of coffee liqueur lifts it even more. If you prefer a no-alcohol version, simply skip the liqueur — the coffee flavor shines through just fine.
You’ll find the best ingredients for this tiramisu bars recipe at any well-stocked grocery store, but if you want to splurge on one item, make it the mascarpone cheese. High-quality mascarpone makes all the difference in this coffee flavored dessert bars’ texture and flavor. If mascarpone isn’t available, a full-fat cream cheese substitution still delivers great results for creamy tiramisu bars.
For customizations, you can swap ladyfingers for graham crackers for a different texture or choose a plant-based cream cheese and coconut cream for a raw vegan blueberry cheesecake bars-inspired twist. Pro tip: Have all your cheeses at room temperature before assembling your tiramisu bars to avoid lumps and ensure smooth, luscious layers.
Let’s Make This!
Ready to bring the magic of tiramisu bars to life? Follow these simple, encouraging steps, and you’ll have beautiful mascarpone tiramisu squares to share.
- Prepare the Coffee Soak: Combine brewed coffee and coffee liqueur in a shallow dish. This soak will flavor your crushed ladyfingers. Don’t rush this step because it sets the coffee foundation for your dessert bars.
- Mix the Cream Cheese and Mascarpone: In a mixing bowl, beat softened cream cheese and mascarpone cheese with powdered sugar until smooth and creamy. Here’s a helpful tip for tiramisu bars success — make sure your mascarpone isn’t too cold or you might get lumps.
- Whip the Cream: In a separate chilled bowl, whip the heavy cream and vanilla extract until stiff peaks form. Gently fold this into the cheese mixture to keep it light and airy, which is what will make your tiramisu bars fluffy.
- Assemble Your Layers: Start by dipping ladyfinger cookies briefly (don’t soak too long or they’ll become mush) in the coffee soak and layering them in your pan. Then spread a generous layer of the mascarpone mixture over the cookies. Repeat one more time so you have a beautifully layered tiramisu dessert.
- Chill the Bars: Cover the pan and refrigerate for at least 4 hours or overnight. This resting time helps everything set perfectly and enhances the flavors.
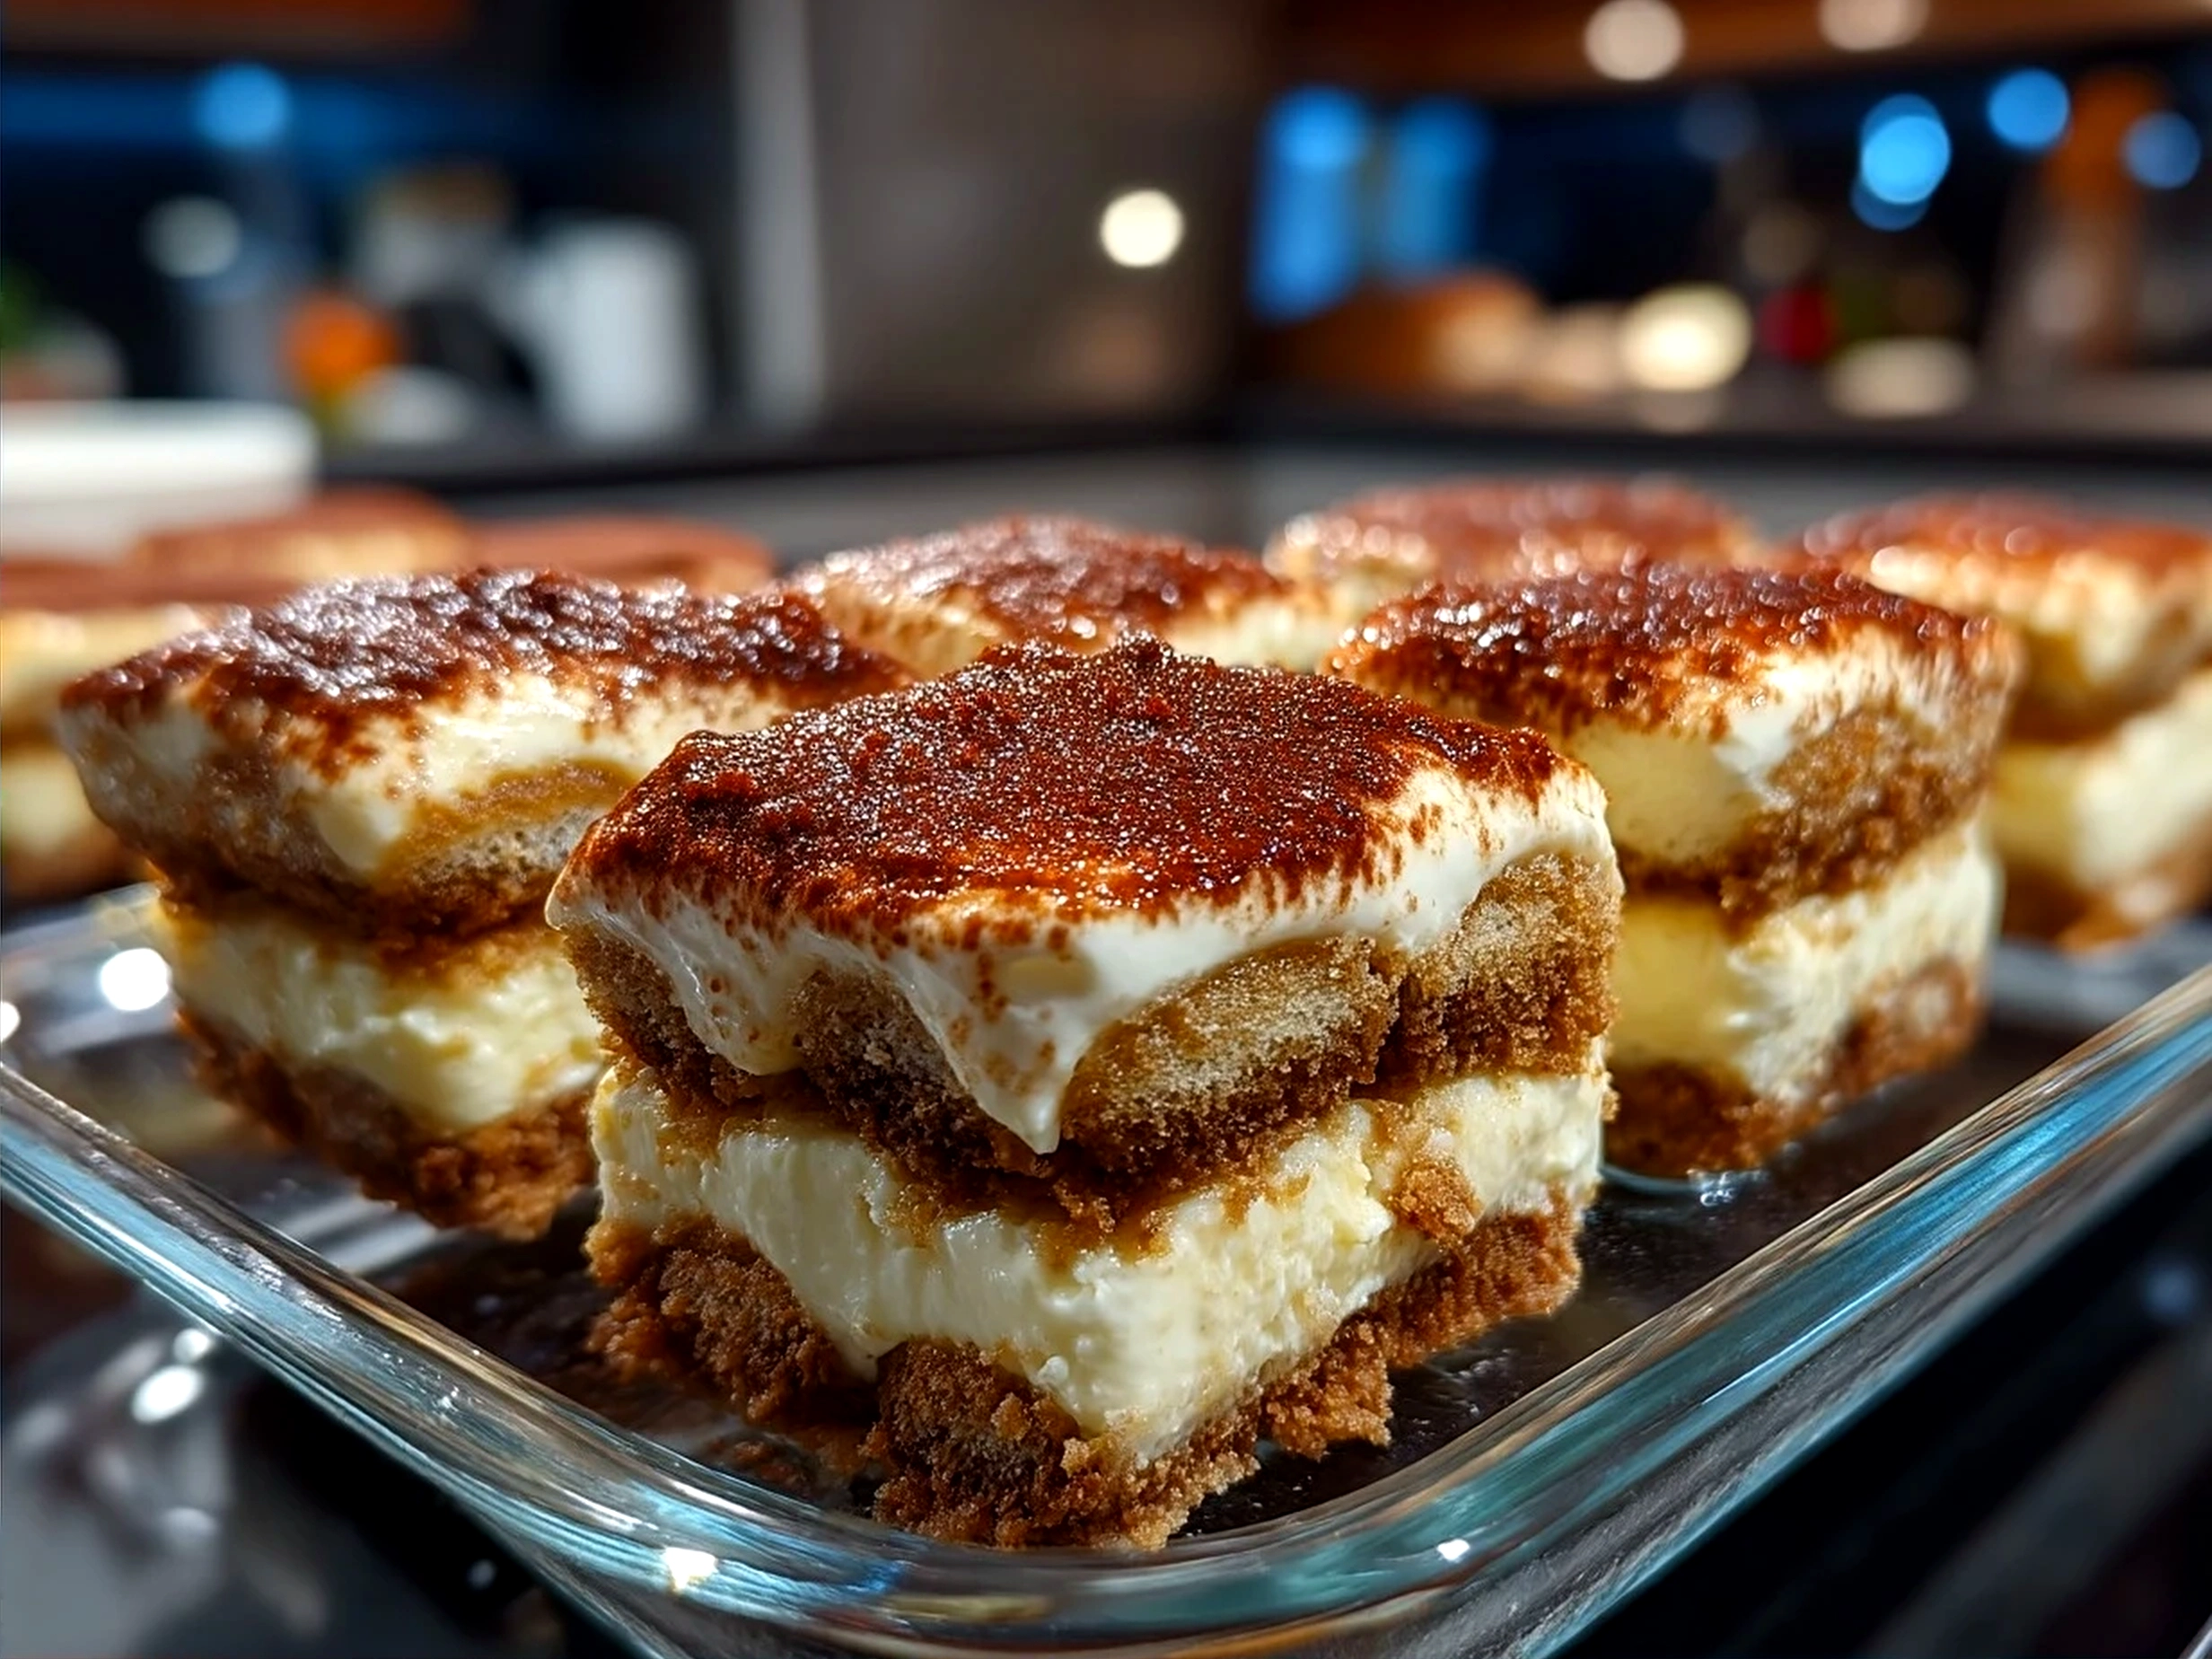
- Finish With Cocoa Powder: Just before serving, dust the top with unsweetened cocoa powder and optional chocolate shavings. This finishing touch makes your tiramisu bars look as good as they taste.
Your tiramisu bars should look creamy with coffee-soaked layers peeking through. The aroma of coffee and cocoa will have your kitchen smelling absolutely inviting while these bars chill. This is where your tiramisu bars transform into something truly special — a comforting coffee flavored dessert bars treat you’ll want to make over and over.
Serving & Presentation:
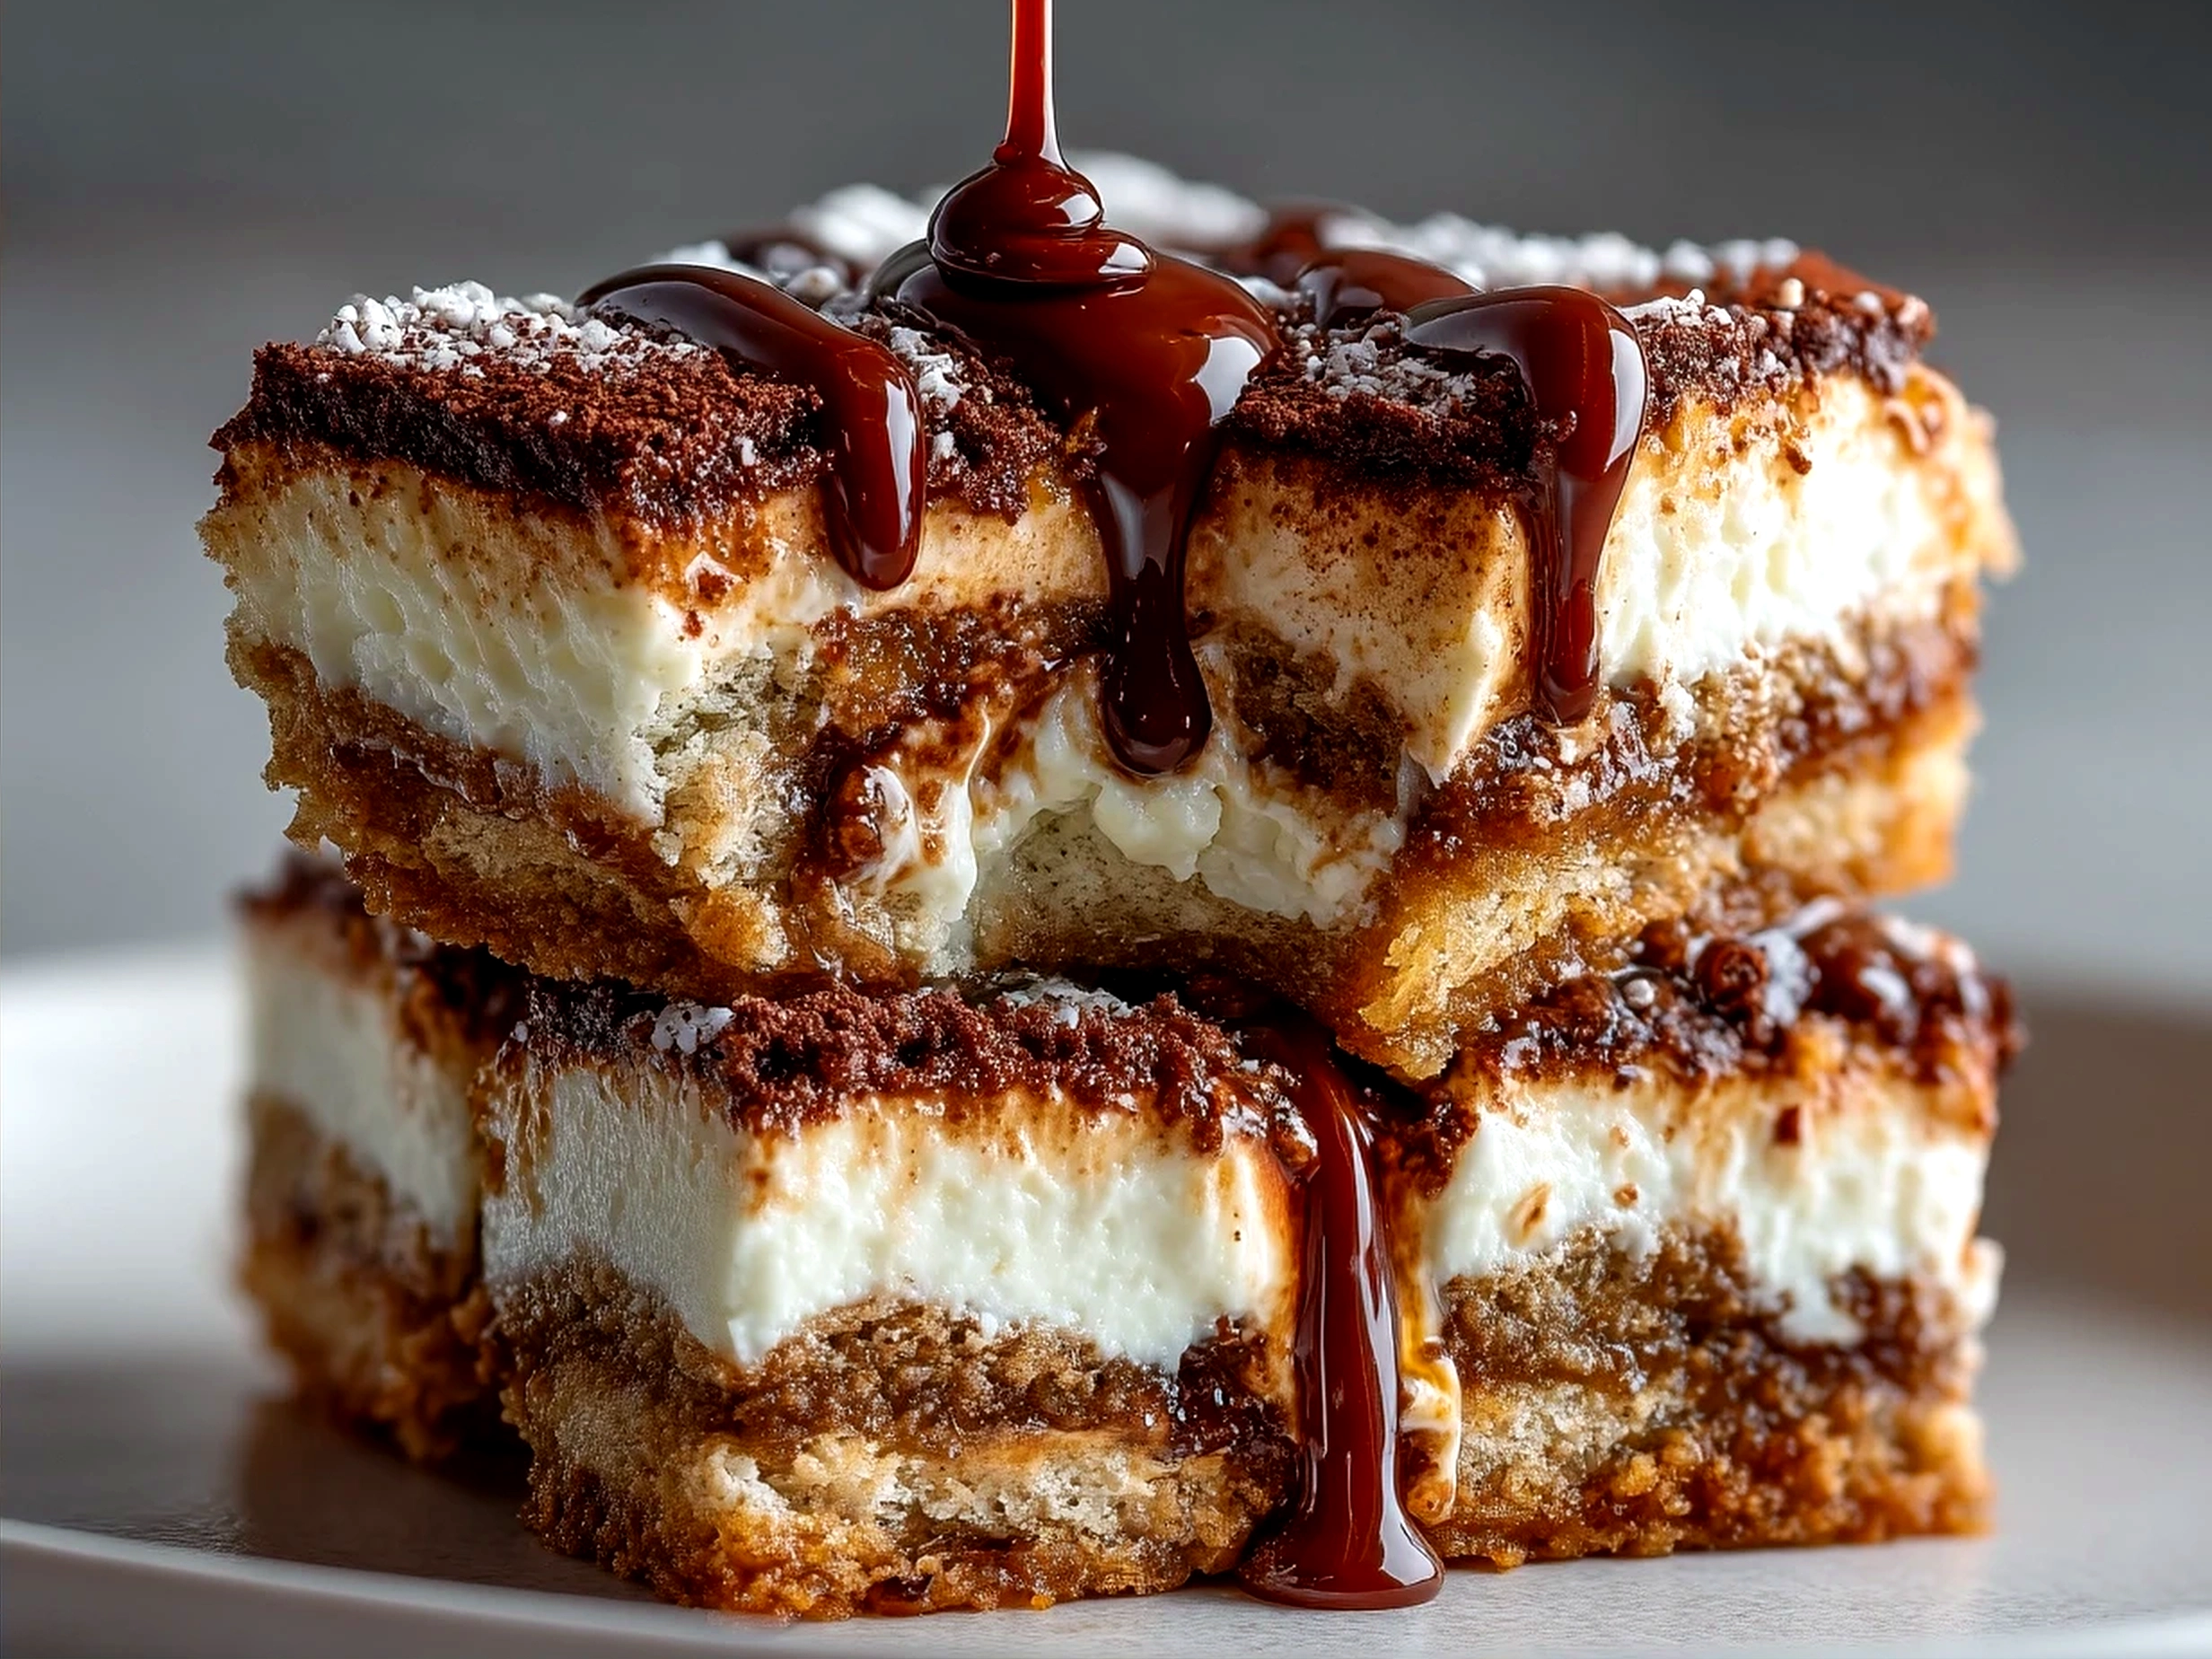
When it’s time to serve, cut your mascarpone tiramisu squares into tidy bars for easy sharing. People always smile when I serve this tiramisu bars at gatherings — it sparks that cozy, indulgent moment everyone treasures. Presentation doesn’t have to be complicated; a dusting of cocoa powder plus a few chocolate curls will impress without taking extra work.
Pair your tiramisu bars with a simple cup of espresso or a creamy latte to enhance that coffee flavor. For a sweet contrast, fresh berries on the side brighten the richness of this layered tiramisu dessert. This coffee flavored dessert bars is perfect for casual family dinners, holiday celebrations, or when you want a no-bake tiramisu bars treat that’s satisfying and fuss-free.
Leftovers? Store them in an airtight container in the fridge, and they’re just as delightful the next day. I’ve also tested seasonal tiramisu bars variations by adding a hint of cinnamon or orange zest to the mascarpone mixture for festive charm. If this recipe brings you joy, you’ll love checking out my carrot cake bars delicious homemade recipe too — another crowd-pleaser for sweet occasions!
FAQs:
Can I make these tiramisu bars ahead of time?
Yes! Making tiramisu bars a day ahead lets the flavors marry beautifully. In fact, the longer refrigerated (up to 48 hours), the better the layering tastes. Just cover tightly to prevent drying out.
What if I don’t have mascarpone for my tiramisu bars?
You can use extra cream cheese as a substitute. The bars may be slightly denser but still reliably creamy and delicious.
Can I make no-bake tiramisu bars without alcohol?
Absolutely. Simply skip the coffee liqueur for a family-friendly version that still bursts with coffee flavor.
How do I know when my tiramisu bars are perfectly done?
They should be chilled firm but soft to the touch with layers set when cut. The mascarpone mixture will hold its shape and won’t be runny.
Can I freeze tiramisu bars?
Freezing is possible, but the texture can change slightly. For best results, freeze only for up to a week and thaw overnight in the fridge.
Are cream cheese tiramisu bars different from mascarpone ones?
Yes, cream cheese bars tend to be tangier and a bit firmer. Combining both, like in this recipe, creates that classic creamy softness.
What if I want a richer tiramisu bars version?
Try my baked tiramisu cheesecake option for a luscious twist you’ll adore, as featured on BAKE WITH ZOHA. It’s a wonderful variation when you want to switch up the texture and show-stopping dessert.
If you want to try a protein-packed alternative, these tiramisu protein bars from Immigrant Stable offer a surprising blend of health and treat!
Why This Tiramisu Bars Will Become Your New Favorite:
This tiramisu bars recipe stands for everything I share at Carmen Wausa — homemade recipes that are comforting, doable, and full of memorable flavor. The blend of cream cheese and mascarpone creates mascarpone tiramisu squares that are creamy but not heavy. The coffee soaked layers bring that classic taste in a layered tiramisu dessert everyone loves.
My Tiramisu Bars Success Tips:
- Use room temperature cheeses and whip cream into stiff peaks for smooth, airy filling.
- Don’t oversoak your ladyfingers or the bars will be soggy, just a quick dip is perfect.
- Chill the bars overnight to let flavors meld beautifully before slicing.
I’ve created many versions, including no-bake tiramisu bars for quick prep, cream cheese tiramisu bars for tangy richness, and variations with seasonal spices. The original mascarpone tiramisu squares are my crowd favorite — always met with smiles and requests for seconds.
Make this tiramisu bars a regular in your dessert repertoire. You’ll find how easy it is to create a coffee flavored dessert bars that feels special but never complicated. I am confident your fellow food lovers will be impressed by your beautiful tiramisu bars, and you’ll love the shared moments it inspires around your table.
Ready to impress? Don’t forget to share your delicious results with me — I’m excited to see how your tiramisu bars turn out! For more inspiration, take a look at my raw vegan blueberry cheesecake bars or carrot cake bars delicious homemade recipes. And if you want to try a traditional style, check out this Easy Tiramisu recipe from Tastes Better From Scratch as a beautiful complement to these bars.
Here’s to many comforting, coffee flavored dessert bars moments ahead!
Tiramisu Bars
Delight in these creamy, coffee-infused Tiramisu Bars that capture the classic Italian dessert in an easy-to-serve bar form, perfect for any occasion.
- Prep Time: 15 minutes
- Cook Time: 0 minutes
- Total Time: 4 hours 15 minutes
- Yield: 9 servings
- Category: Dessert
- Method: No-Cook
- Cuisine: Italian
Ingredients
- 1 cup strong brewed espresso, cooled
- 3 tablespoons coffee liqueur (optional)
- 2 cups mascarpone cheese
- 1 cup heavy cream
- 3/4 cup granulated sugar
- 1 teaspoon vanilla extract
- 24 ladyfinger cookies
- 2 tablespoons cocoa powder, for dusting
- 2 ounces dark chocolate, grated (optional)
Instructions
- In a shallow dish, combine the espresso and coffee liqueur. Briefly dip each ladyfinger into the mixture and arrange them in a single layer in an 8×8 inch pan.
- In a mixing bowl, beat mascarpone cheese, heavy cream, sugar, and vanilla extract until smooth and fluffy.
- Spread half of the mascarpone mixture evenly over the ladyfingers.
- Repeat the dipping and layering process with more ladyfingers, then top with the remaining mascarpone mixture.
- Cover and refrigerate for at least 4 hours or overnight to set.
- Before serving, dust the top with cocoa powder and sprinkle with grated dark chocolate if desired.
- Cut into bars and serve chilled.
Notes
For an extra indulgent touch, sprinkle some chocolate shavings or add a splash of coffee liqueur to the mascarpone mixture.